Application Wizard
This chapter shows how to create a new imaging application, using the application wizard.
Introduction
The application wizard creates the project for a complete imaging application.
The following functionality is available out of the box:
- Event handler to open a video capture device
- Event handler for image settings
- Event handler to start and stop the live video
- Automatic reload the previously used video capture device
Optional functions are:
- Add image processing capabilities
- Display the result of the image processing, instead of the live video
How to use
First of all, start Visual Studio. As soon as the Start Page appears,
click on the New Project button. If this dialog does not appear,
select File -> New -> Project from Visual Studio's menu.
This article describes the wizard for C#.
You should see the following dialog:
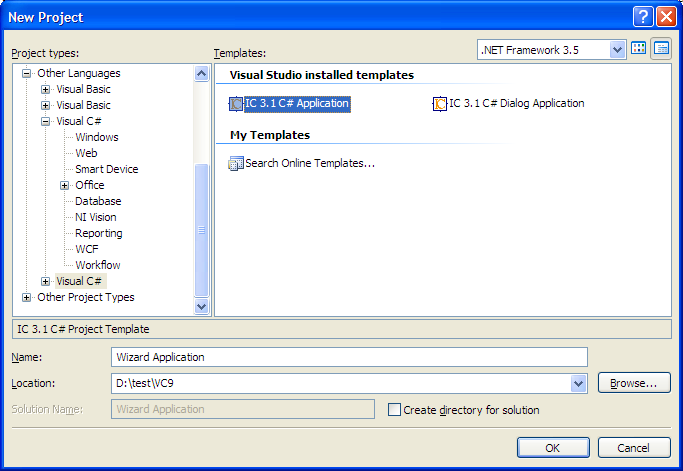
Select the icon labeled IC 3.1 C# Application
and enter a valid project name into the
Name input field, for example "ImageProcessing". Then, click on the OK button.
Once this step has been competed, you can set the projects parameters:
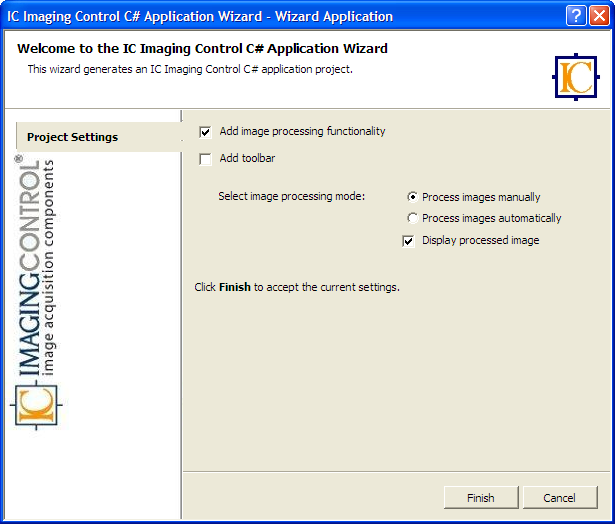
- Add toolbar check box
-
When this check box is checked, an toolbar is inserted into
the applications form. This check box is not in the dialog application available.
- Add image processing functionality check box
-
When this check box is checked, an image processing method is inserted into
the application. For demonstration purposes, the image is inverted.
- Process image manually / Process images automatically radio buttons
-
This setting determines whether:
i) the image processing method is applied to a frame only when the user clicks on a menu entry or a button;
or whether: ii) the image processing method is applied to all frames.
- Display processed image check box
-
When this check box is checked, the resulting image of the image processing is
displayed instead of a live video.
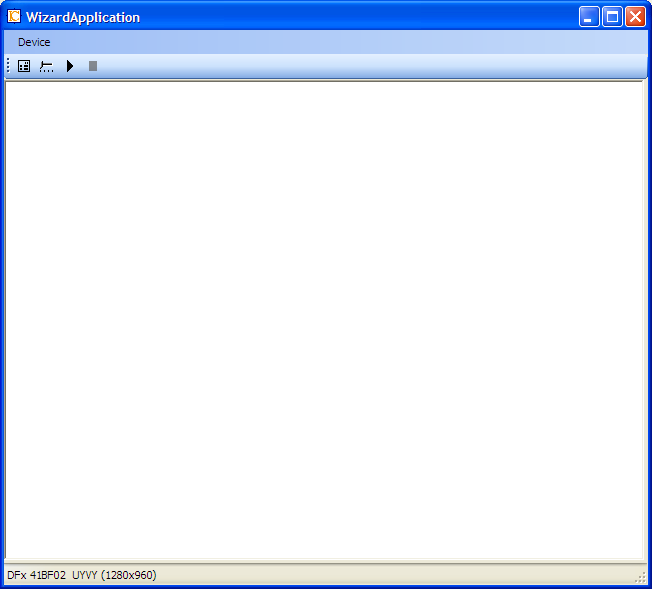
Resulting Application
Once you have followed all the steps on this page, click on the Finish
button to finish the project. The project will then be created by the wizard.
The newly created application should look as follows:
<< Project Wizards for Visual Studio