RGB24 is a 24 bit color format. Every pixel is represented by 3 bytes, while every byte of this triple corresponds to one color value. The letters 'RGB' mean Red, Green and Blue, so one byte represents the red value, one byte represents the green value and the last byte represents the blue value.
Please note that the name RGB can be misleading, since the first byte of a pixel does not necessarily have to represent the red value. In the Windows© environment, RGB data is typically organized in the order BGR. This means that the first byte represents the blue value, the second byte represents the green value and the third byte represents the red value of a RGB24 pixel. IC Imaging Control uses BGR order for the RGB24 pixel format. The organization of the pixels in the image buffer is from left to right and bottom up.
A video capture device, video format, FrameHandlerSink with a ImageBuffers collections, which defines the image data color format must have been setup. The following code fragments show step-by-step how to access and manipulate the pixel data of RGB24.
First of all, we have to capture an image. Otherwise, the image buffer would be empty. To do so, live mode is started and FrameHandlerSink.SnapImage is called.
To access the bytes of the image buffer, you can write buf[column,line] in C# and buf(column,line) in VB.NET.
In this example, we want to read out the first (upper left hand) two pixels of the image. In a second step, we manipulate the first 3 pixels. Because RGB images are stored bottom-up, the index of the first line is lines-1.
To calculate the x-coordinate of the pixel data, the number of bytes required for one pixel (3) is multiplied with the column of the pixel to be retrieved. After that, an offset is added to access the red, blue or green component of the pixel.
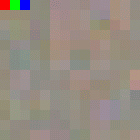
Instead of only reading pixel data, it is, of course, possible to manipulate the data as well. The following code sets the upper left pixel to red and the next 2 pixels to green and blue. After this manipulation, the image is saved to a .bmp file.
To check the result, open the saved image and take a look at the upper left hand pixels. They should look as follows:
