Scan2Docx Documentation
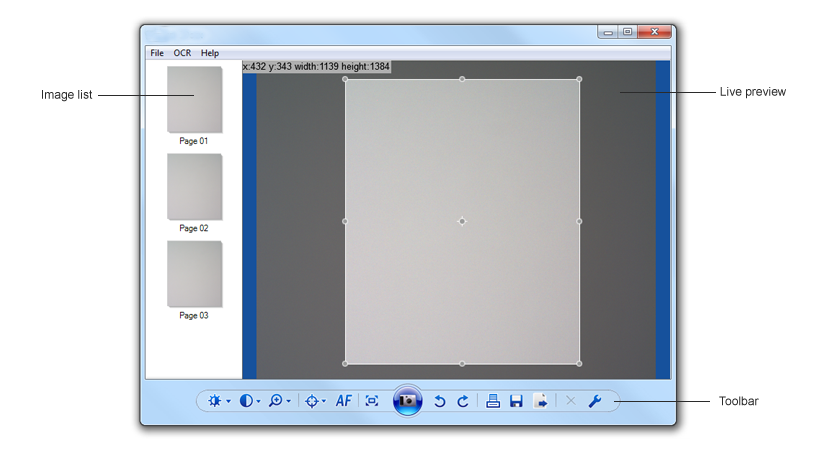
Scan2Docx is an easy-to-use scan and storage application that has been designed to digitize photographs and documents. The scanned images can be saved, printed and exported to a PDF, MSWord or Office Open XML file.
Device Selection and Configuration
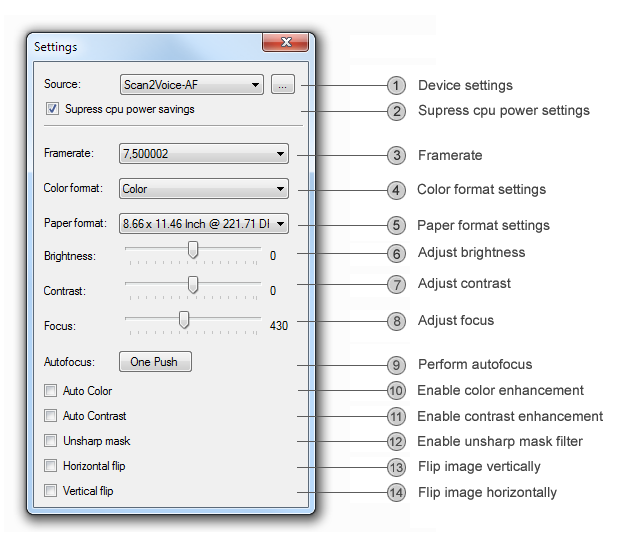
On starting the application, Scan2Docx tries to open the first available video capture device. In the case that no video capture devices are installed on the PC, the device setting dialog opens, so that you can manually select a device.
View and Image Settings
Using the left buttons of the toolbar, you can change the view and image settings before scanning. This is illustrated in the following screenshot:

-
You can change the brightness of the image, by using the Change brightness
 button. A slider will appear beneath the icon.
-
You can change the contrast of the image, by using the Change contrast
 button. A slider will appear beneath the icon.
-
You can change the scaling factor (i.e. zoom in on the image), by clicking the Change
scaling factor
 button. A slider will appear
beneath the icon. Once you have zoomed in, you can move around the image, by clicking and holding
the right mouse button and moving the mouse. This allows you to see a specific part of the image.
You can also change the scaling factor using the scroll wheel of your mouse.
button. A slider will appear
beneath the icon. Once you have zoomed in, you can move around the image, by clicking and holding
the right mouse button and moving the mouse. This allows you to see a specific part of the image.
You can also change the scaling factor using the scroll wheel of your mouse.
-
You can change the focus value, by clicking the Change focus
 button. A slider will appear beneath the icon.
-
You can initiate the autofocus, by clicking the Auto focus
 button. This cause the application to use the optimal
picture sharpness.
button. This cause the application to use the optimal
picture sharpness.
-
You can switch back to the original size of the image, by clicking on the Real size
 button. Similarly, you can fit the image to your window,
by clicking on the Fit into window
button.
button. Similarly, you can fit the image to your window,
by clicking on the Fit into window
button.
-
You can rotate the image clockwise, by clicking on the Clockwise rotation
 button and counterclockwise with the Counterclockwise
rotation
button and counterclockwise with the Counterclockwise
rotation  button.
Selecting a Specific Region
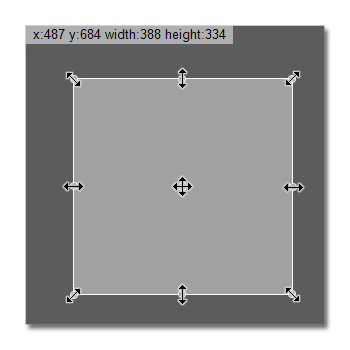
Scan2Docx allows you to select a specific region of interest (ROI). By clicking and dragging the handles in the corners of the image, you can select the part of the image in which you are interested. You can move the entire selected region by clicking and dragging the handle in the center of the image. To select the entire image again, simply double-click on the handle in the middle.
The region of interest will be cropped from the scanned image.
Starting the Scan Process
To start scanning a document, click on the scan button ![]() in the
toolbar. Once a page has been scanned, it is displayed in the list on the left of the page.
in the
toolbar. Once a page has been scanned, it is displayed in the list on the left of the page.
Manage and View Scanned Images
To see a preview of the scanned images, click on an image in the image list.
-
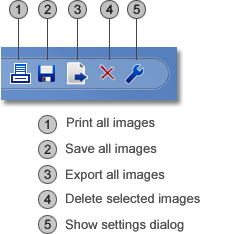
To print all images, click Print all images
 .
.
-
To save all scanned images to disk, click on Save all images in the
File menu
 . To save just specific images
to disk, left-click on the images you wish to save and then right click and select Save
marked images.
. To save just specific images
to disk, left-click on the images you wish to save and then right click and select Save
marked images.
-
To export the scanned images to a PDF, MSWord or Office Open XML document, select Export all
images
 from the File menu.
-
You can delete images by selecting them (left mouse click) and then selecting the Delete
selected images button
 .
.
-
To open the video capture device setting and configuration dialog, select Show settings
dialog in the File menu or click on the
 button.
Text Recognition
Scan2Docx supports a comprehensive OCR software with superior recognition accuracy. All the OCR features can be used from the menu bar at the OCR menu.
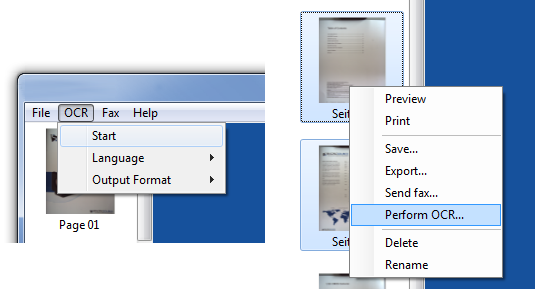
- In order to start the text recognition, it must be clicked on Start in the OCR menu.
- The recognition language can be selected at Language in the OCR menu.
- The output format must be set to PDF or RTF at Output format in the OCR menu.
- In order to apply the OCR on multiple scanned documents, it must be clicked on Perform OCR... in the context menu.
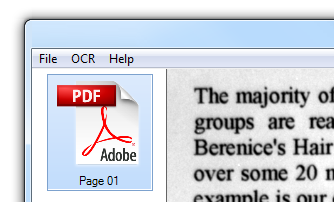
All recognized documents are automatically inserted in the image list at the left and can be handled just like scanned images. In order to re-create the document's logical structure and formatting, PDF must be selected as output format.
Hot key-table
| Function | Hot key |
|---|---|
| Scan | Ctrl + Space |
| Auto focus | Ctrl + F |
| Save all pages | Ctrl + S |
| Export all pages | Ctrl + P |
| Zoom in | Ctrl + Plus |
| Zoom out | Ctrl + Minus |
| Delete selected pages | Del |