
How to Optimize Image Quality From Industrial Cameras
Industrial cameras are typically designed for machine vision tasks such as inspection, measurement, barcode reading, and automation, where imaging priorities often differ from those of portrait or consumer photography. Unlike smartphones, industrial cameras usually prioritize raw sensor data, repeatability, and application control over automatic color enhancement, HDR, or aesthetic image tuning.
However, many real-world applications still require images that are optimized for human viewing. Examples include digitizing historical film, monitoring operator cabins or vehicle interiors, and documenting production processes. This guide explains the key camera settings that influence image appearance, including exposure, gain, white balance, gamma, saturation, tone mapping, and HDR, so you can get the best results from your industrial camera.
General Best Practices
Lighting: Lighting is the most important factor in image quality. Poor lighting, unfavorable light angles, or flickering illumination will always limit results. The best images are achieved under controlled lighting conditions. If scratches, contours, or surface texture must be emphasized, side lighting is often effective because it creates shadows that improve contrast.
Automatic Functions: Automatic exposure, gain, and white balance are convenient and often sufficient for changing environments. However, in stable lighting conditions, manual adjustment typically provides the best and most consistent results.
Gain: Use gain sparingly. Increasing gain amplifies both signal and sensor noise. Whenever possible, improve brightness by increasing exposure time instead.
Exposure Time: If the scene is stationary, exposure time can often be increased to gather more light. If objects are moving, exposure time must be reduced until motion blur is acceptable.
Avoid Overexposure: Overexposed white areas contain no recoverable image detail. Dark areas, by contrast, often still contain usable information that can be enhanced later. For this reason, it is generally better to slightly underexpose than to clip highlights.
Monitor Limitations
A standard 24-bit RGB monitor can display 16.7 million colors using 8 bits per color channel.
If the camera outputs 10-bit or 12-bit image data, this higher bit depth must be compressed to 8-bit for display. While useful image information remains in the original data, some visible tonal detail may be lost during display conversion.
Monitor calibration, brightness, contrast, and age can also affect how camera images appear.
Camera Parameters Explained
Exposure time determines how long the sensor collects light before the image is read out. Longer exposure increases brightness but may introduce motion blur.
Gain is an analog amplification stage applied at the sensor level. Higher gain increases brightness but also increases image noise.
White balance adjusts the red, green, and blue channels so that neutral objects appear natural under different light sources.
Gray World Auto White Balance: The Gray World algorithm attempts to align the RGB channels based on average scene values. This works well in many mixed scenes, but can fail when one color dominates the image. For example, a blue carpet may be incorrectly neutralized toward gray.
Temperature-based white balance compensates according to the expected color temperature of the light source. In scenes dominated by one color, it often performs better than Gray World balancing.
Saturation controls color intensity. Lower values reduce colorfulness toward grayscale while higher values increase vividness. The default value is often 100%. Moderate increases may improve visual appearance.
Gamma adjusts tonal brightness distribution. Values below 1.0 brighten midtones; values above 1.0 darken midtones. Gamma can improve visibility, but aggressive adjustments may reduce fine detail.
Tone mapping compresses wide dynamic range image data into a form suitable for display. It is especially effective when using 10-bit or 12-bit source data and displaying on 8-bit monitors. Tone mapping can reveal shadow detail while preserving highlights.
Intensity controls the strength of the tone mapping transformation. Higher values increase shadow enhancement but may reduce highlight fidelity.
Global brightness factor balances global scene brightness against local pixel luminance during tone mapping. This can help distribute contrast more naturally across the image.
Example: Revealing Dark Areas in a High-Contrast Scene
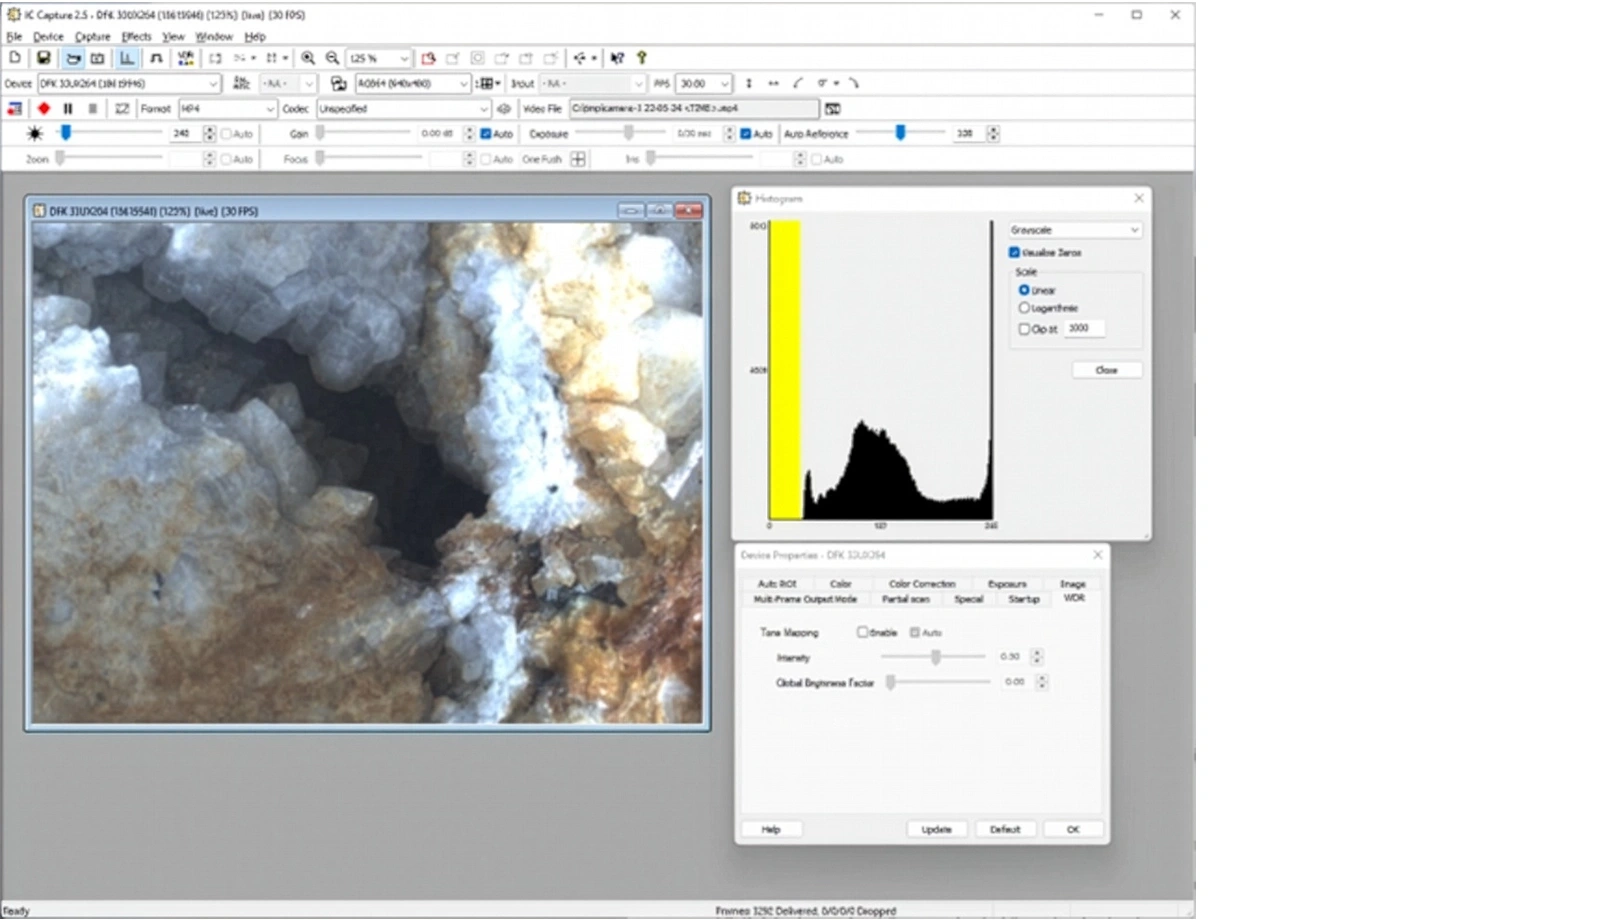
A scene containing bright quartz crystals and a dark central cavity presents a common challenge: highlights are clipped while shadows lack visible detail.
Step 1: Select a High Bit-Depth Format
Use a high bit-depth RGB format when available. Some camera families provide 10-bit color depth while others provide 12-bit color depth. These additional tonal values are especially useful in darker image regions.
Step 2: Use the Histogram
The histogram shows brightness distribution across the image. In this example: Pixels clipped on the right indicate overexposure. Lack of dark tonal spread indicates compressed shadows. The first goal is to reduce highlight clipping.
Step 3: Adjust Exposure Time
Disable automatic gain and white balance. Reduce exposure until highlights are no longer clipped while preserving as much overall brightness as possible.
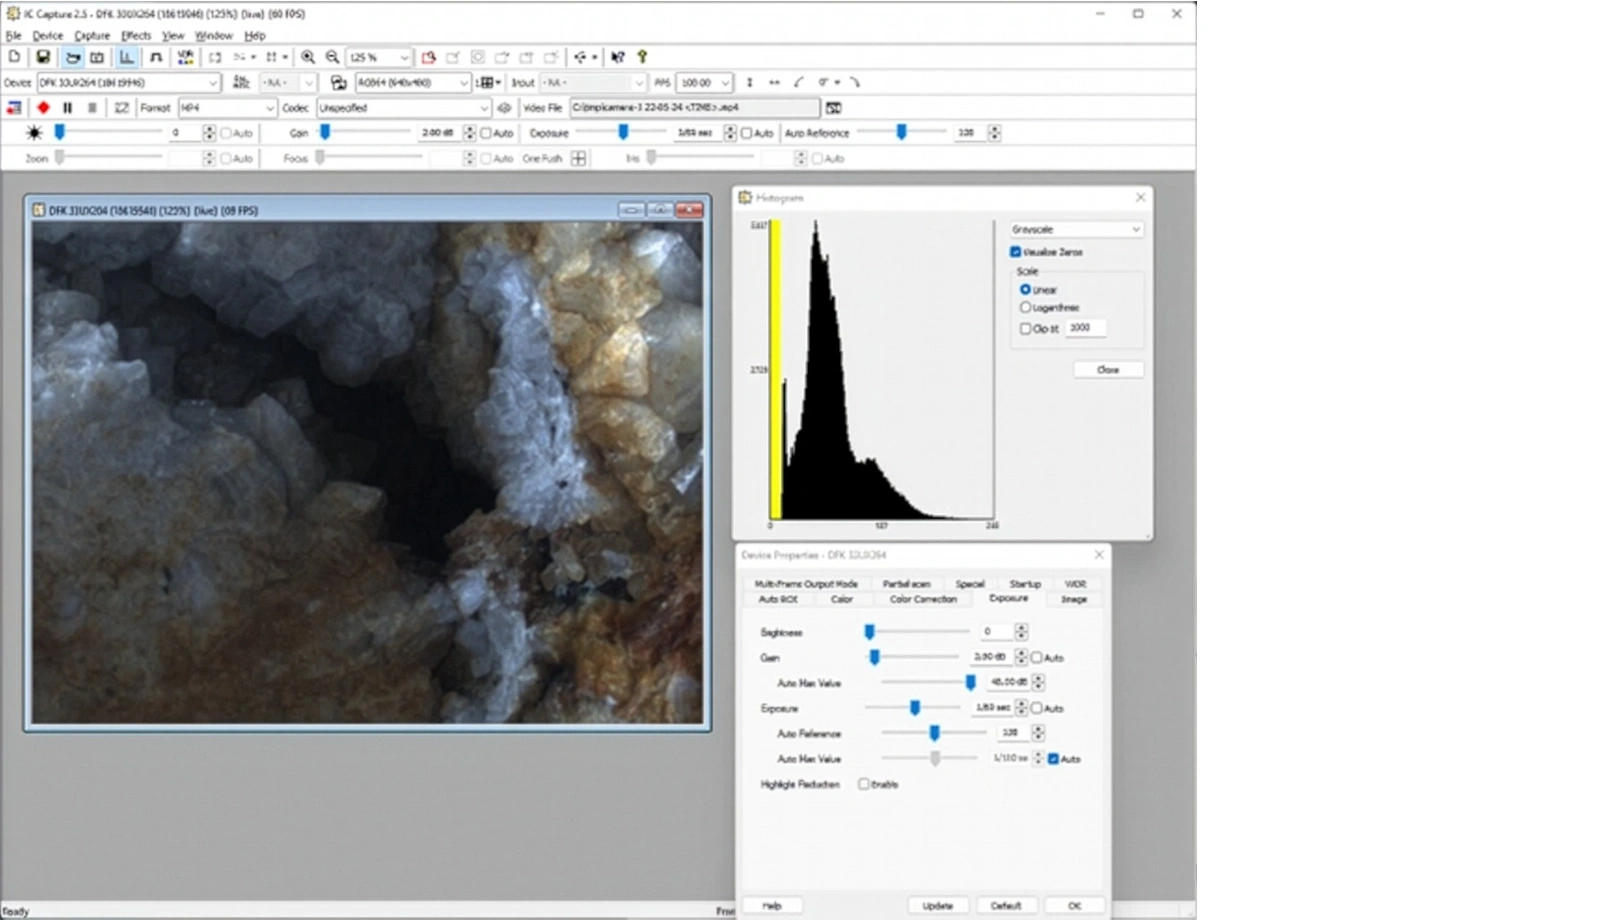
Step 4: Apply Tone Mapping
Use Tone Mapping to brighten dark areas while retaining highlight detail.
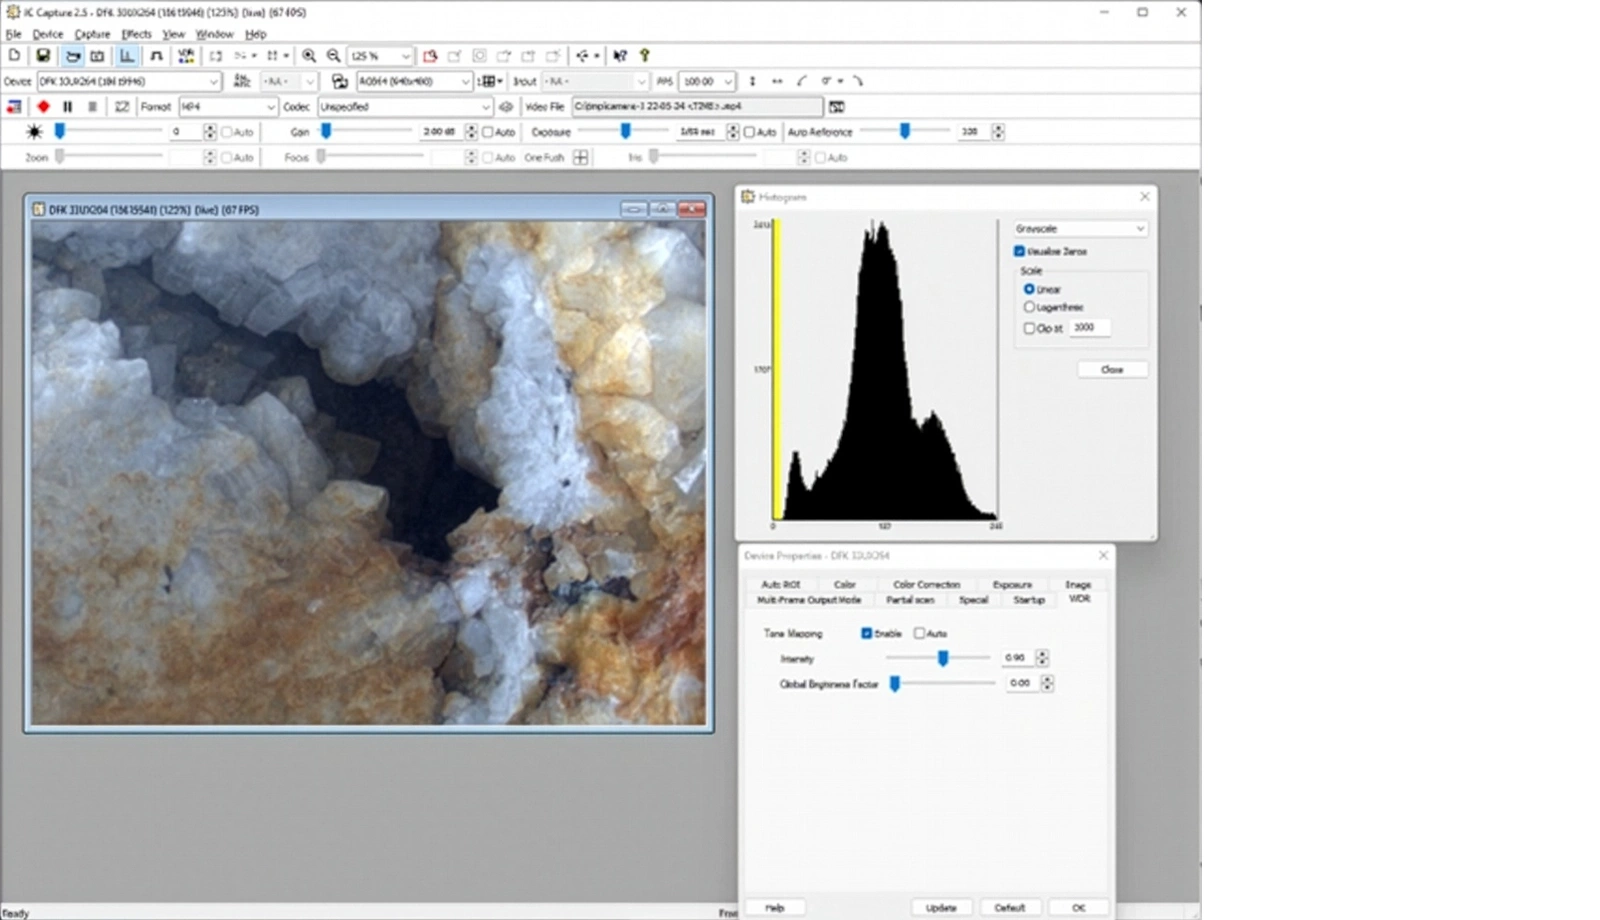 Adjust Intensity first, then refine with Global Brightness Factor. This reveals detail inside the darker cavity while preserving the brighter crystal surfaces.
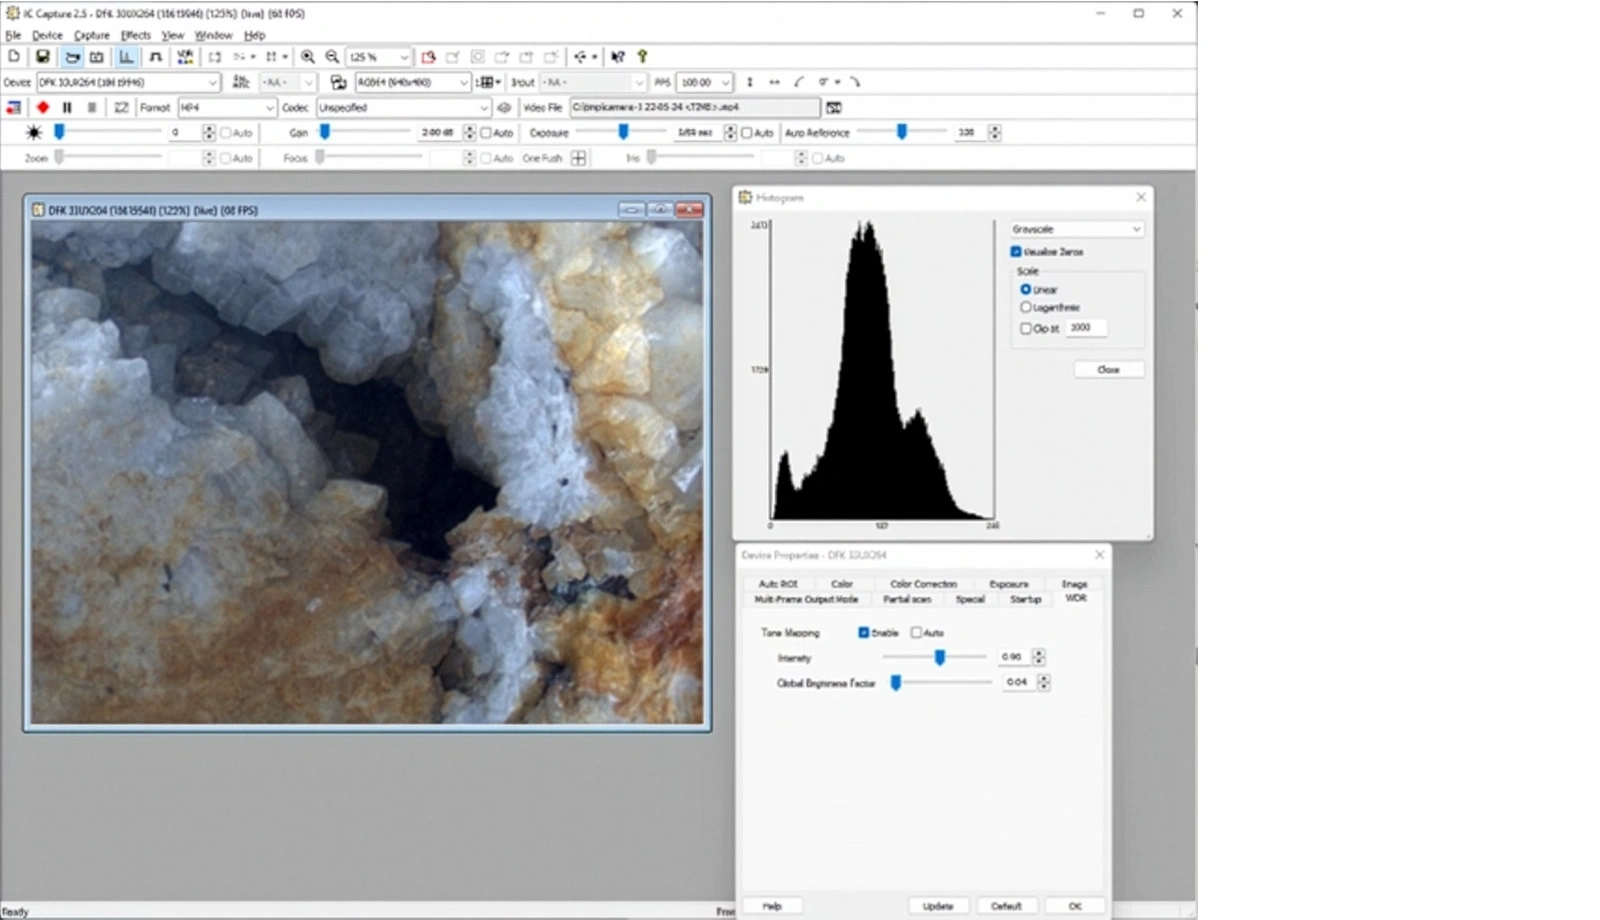
Step 5: Fine-Tune Gamma
Apply small gamma adjustments to further improve midtone visibility. Use caution when adjusting: Strong gamma correction can flatten texture detail.
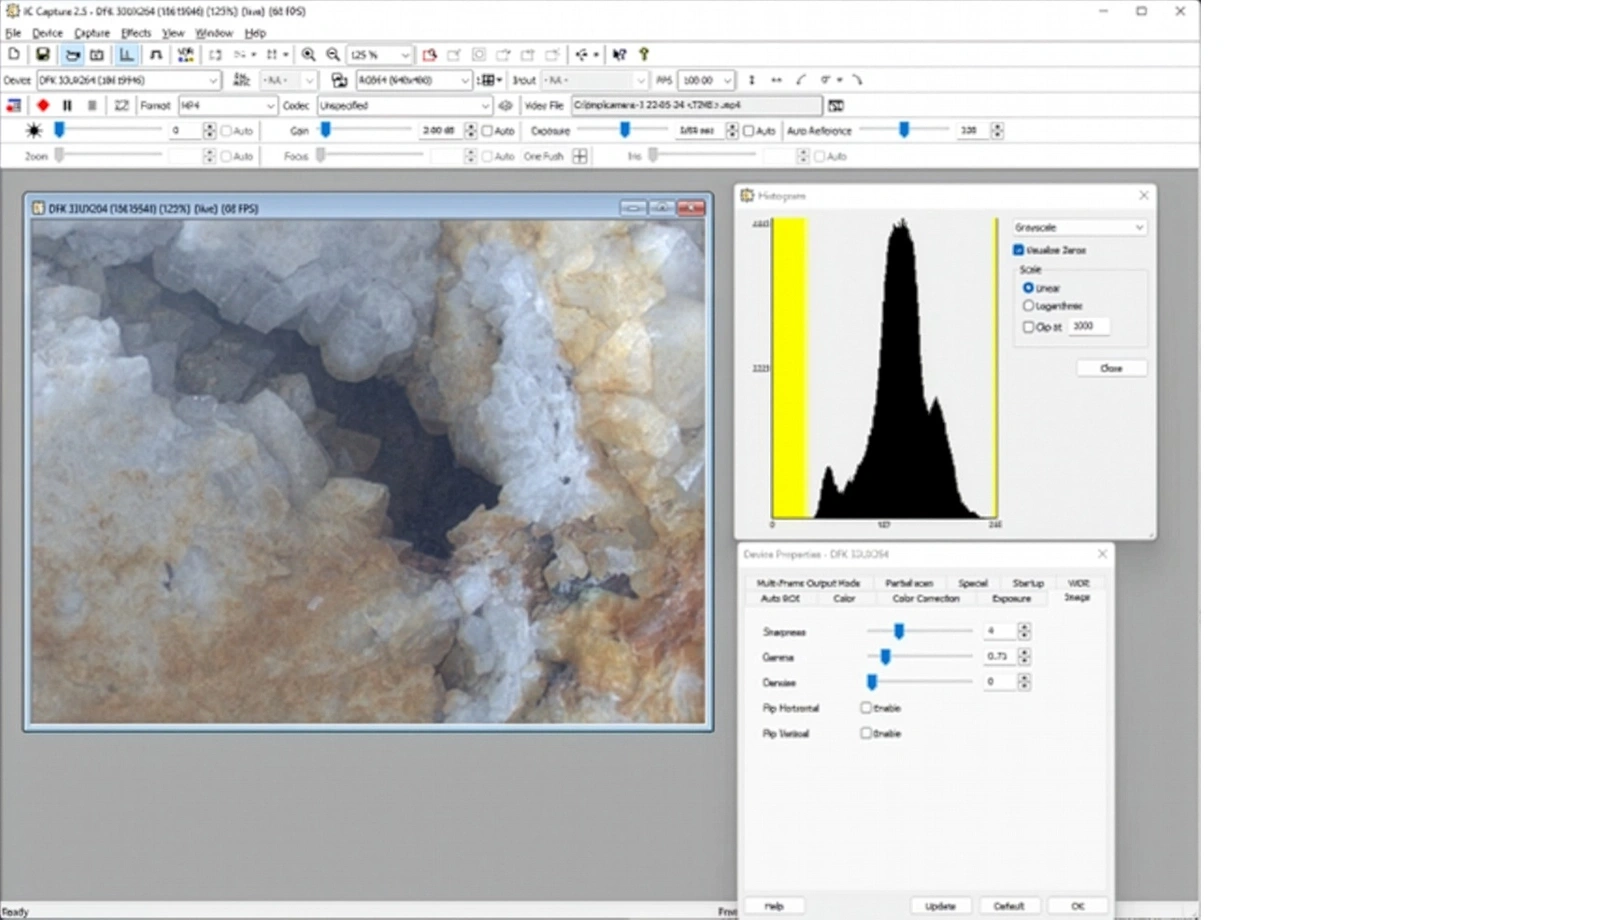
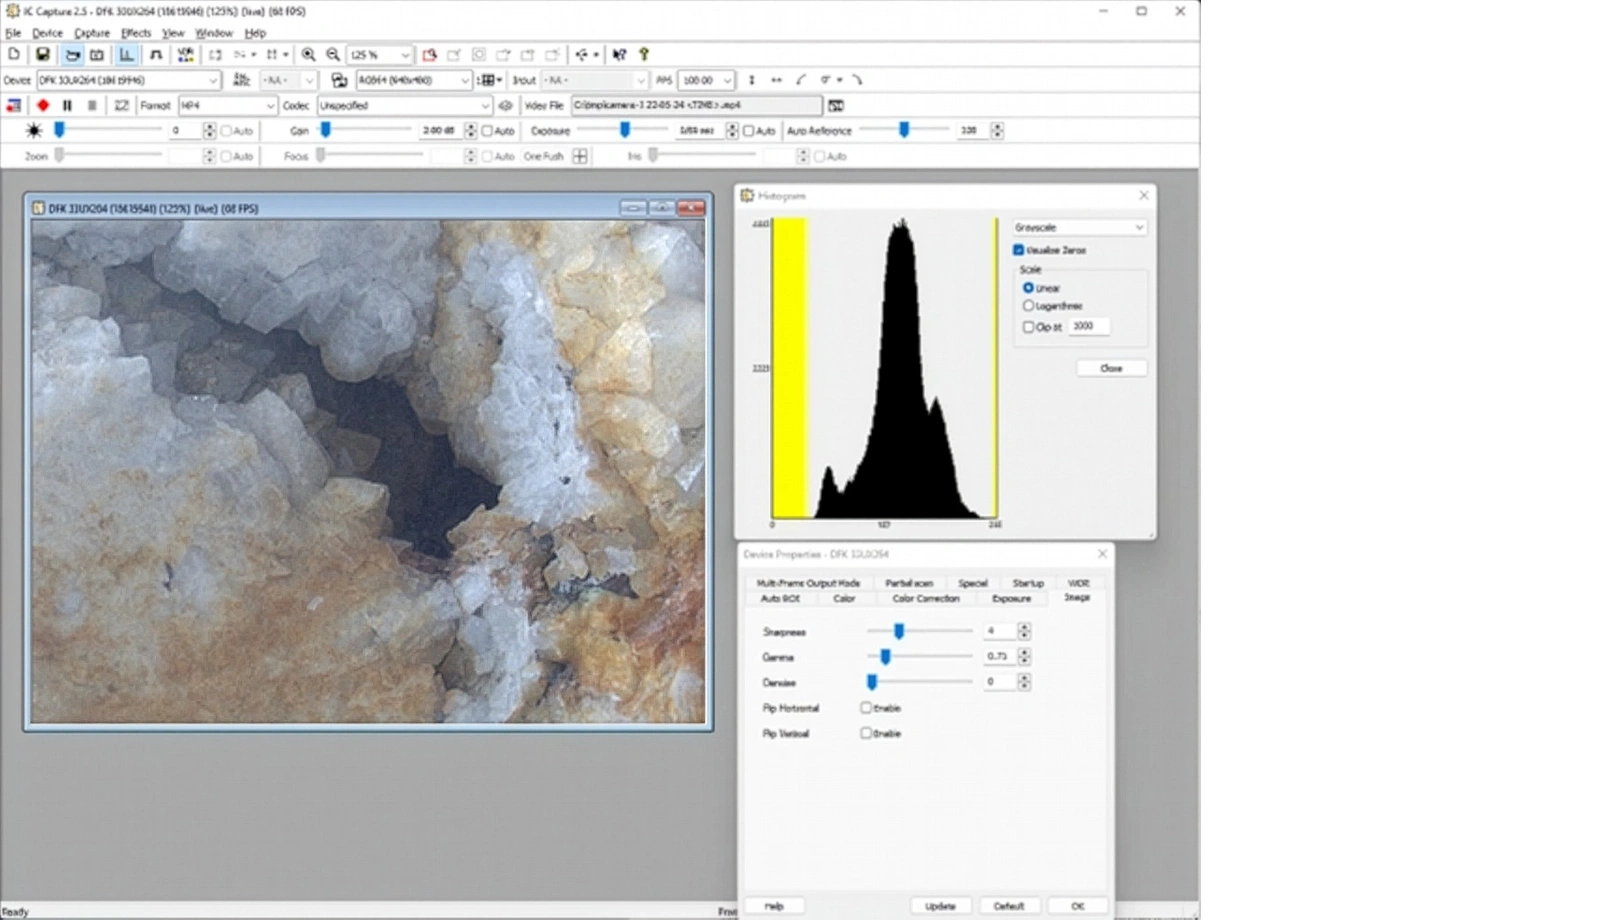
Step 6: Add Sharpness
Sharpness increases edge contrast, making structures appear clearer. Make adjustments moderately to avoid halos or noise enhancement.
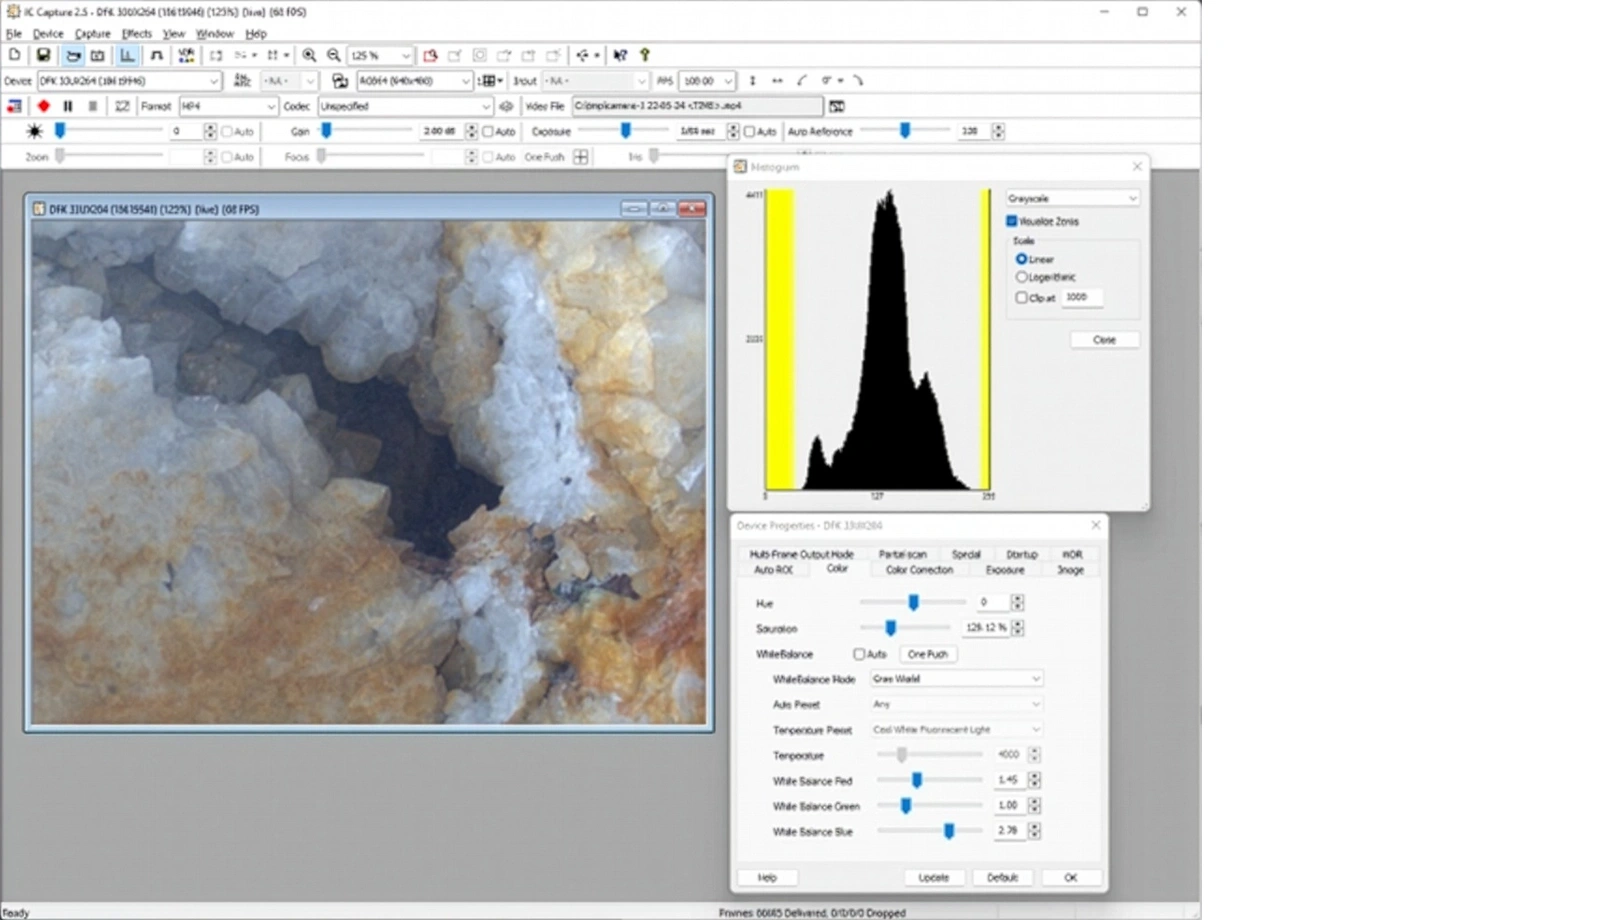
Step 7: Adjust Saturation
If needed, increase saturation slightly to restore subtle color detail.
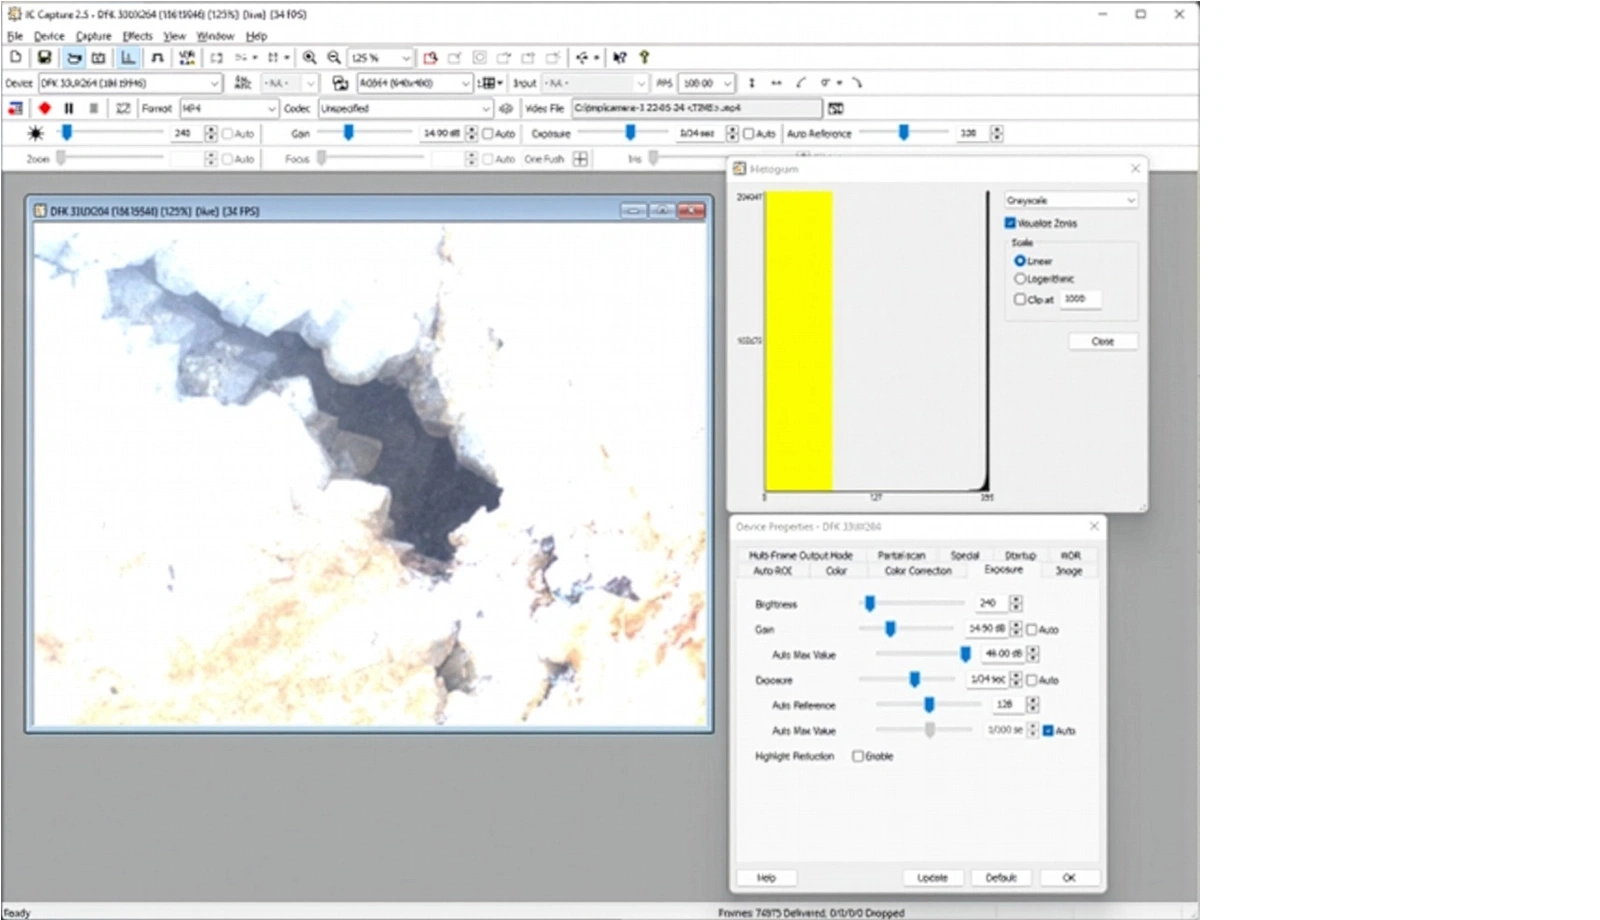
Exposure-Only Alternative
If image processing features are unavailable, increasing exposure alone can reveal shadow detail. However, this often causes highlight clipping and is usually less effective than a balanced workflow using tone mapping or HDR.
Summary
The best solution is often improved lighting. If the dark region can be illuminated directly, image quality will usually exceed any software-based correction.
When automatic functions are disabled, manual settings must be readjusted whenever lighting conditions change. Industrial cameras are typically optimized for controlled, repeatable environments.
HDR Imaging
For scenes with extreme contrast, multiple exposures can be captured and combined into a single high dynamic range (HDR) image.
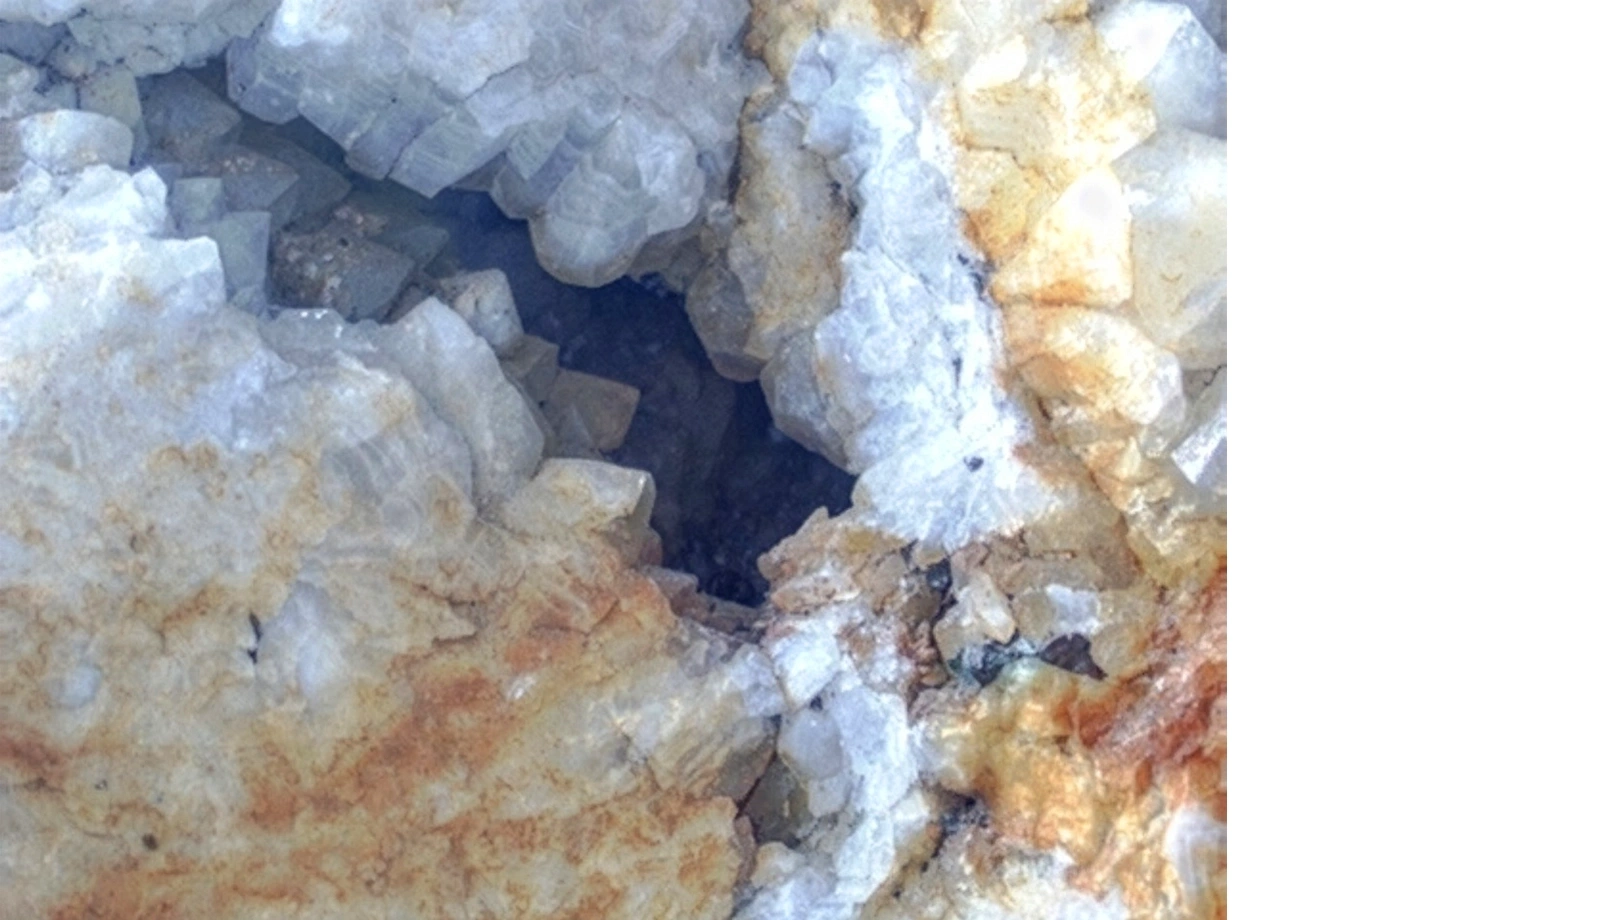 For example, several images captured at different exposure times can be merged using software libraries such as OpenCV.
HDR processing is especially useful for:
-
Static scenes
-
Still image capture
-
Inspection documentation
-
Challenging mixed-light environments
Because multiple frames must be captured and processed, HDR is generally less suitable for fast-moving scenes or real-time applications.